WIN Career Readiness System: Class Management
Class Management can be used to create and populate class rosters. A class list can be exported to Excel. Class Reports are available in the Version 2.0 reports.
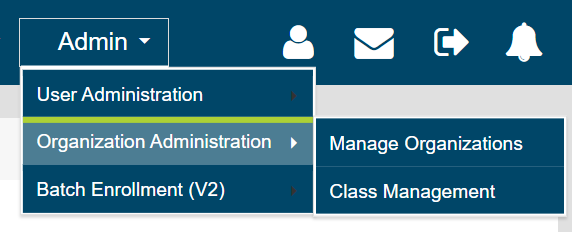
Creating a New Class: First, navigate to Class Management through the menu header drop downs: Admin > Organization Admin > Class Management.
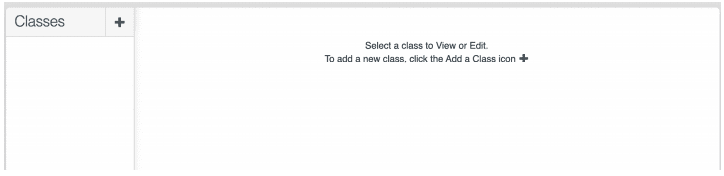
Select the blue plus sign to create a new class.
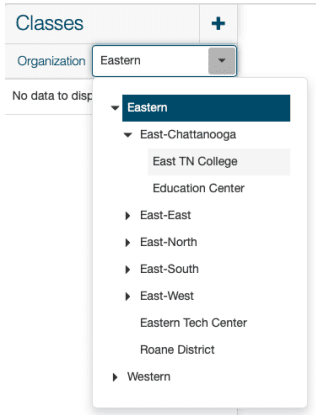
To create a class as an Administrator over several organizations, use the organization drop down to select the organization and then select the blue plus sign to create the class.
Once the blue plus sign is selected, the Create Class screen will appear.
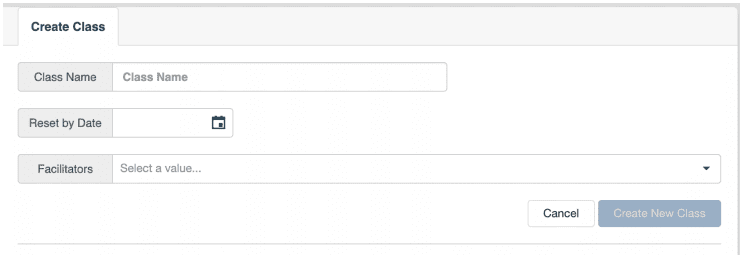
The minimum information required to create a class is Class Name. Type in the class name and select Create New Class.
Note: The class name must be unique within the organization. Ideas to ensure uniqueness include the year, class period, or other identifying features of the class. For example, “2019 Mrs. B Period 2 Math”.
The new class will appear in the list of classes on the left panel and the Class Assignment tab will appear.
Reset by Date will clear all learners from the class on a designated date so new learners can be added. Archive by Date will archive the class and the class will only appear in the class list if Display Archived Classes is selected.

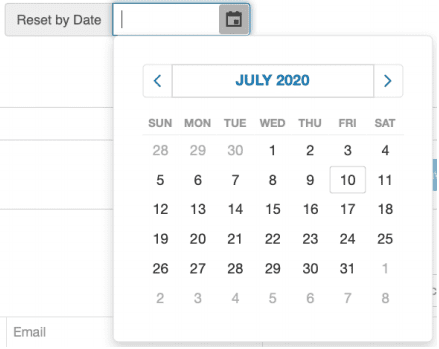
Reports can be generated for the class after it has been reset. Navigate to Class Reportsand select the date range the class used the system.
Assigning Facilitators
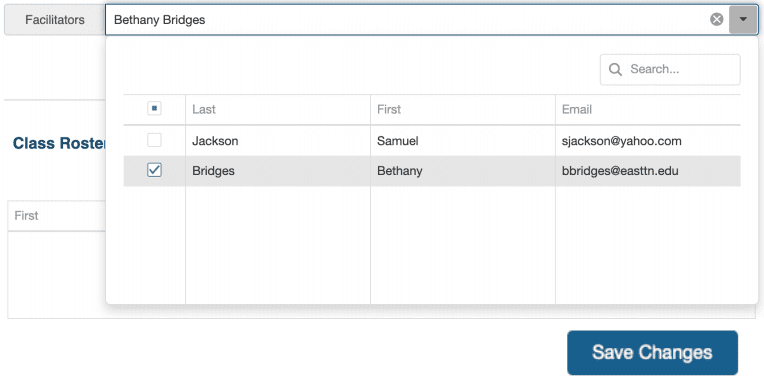
During the Create a Class process or any time after, facilitators can be added. To add facilitators, click in the Facilitators box and a list of available facilitators will appear. Select the checkbox next to each facilitator to be added to the class. More than one facilitator may be added. Be sure to select Save Changes. To find a particular facilitator easily in a long list, use the Search feature.
Assigning Learners
After the class is created, learners can be assigned. Go to the Class Assignment tab, which becomes visible after the class is created.

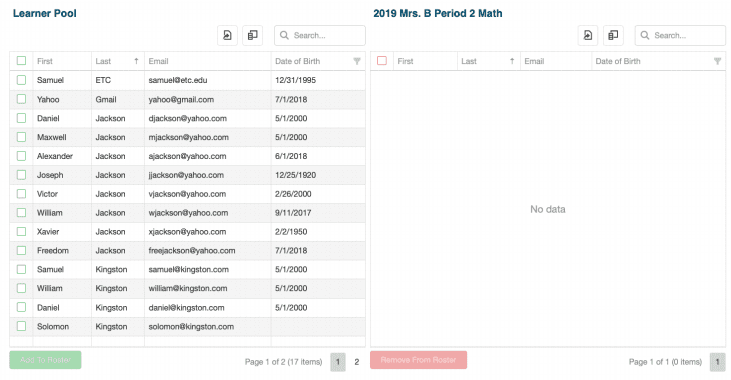
The Learner Pool will be on the left, which displays all learners in the organization who are able to be added to the class roster. On the right is the empty Class Roster.
Column Chooser
By default, the grid displays the columns: First name, Last name, Email, and if available, Date of Birth for each learner. To add columns with additional learner data, select the Column Chooser icon.
Note: The data available depends on the set up of your portal client.
Select the Column Chooser icon and then select from the list the data to be displayed in the grid.
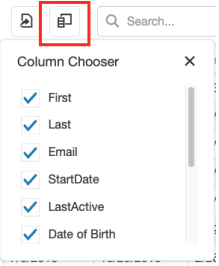
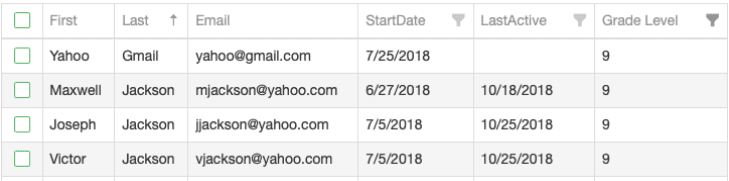
StartDate and LastActive were added to the grid below in addition to the default columns.

Search, Sort, and Filter
The Learner Pool may be several pages long. There are many ways to narrow down the Learner Pool by using Search, Sort, and/orFilters.
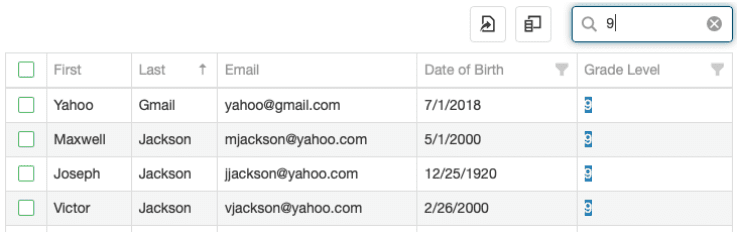
Use the Search box to search for any non-date data to help locate a particular learner or set of learners. For example, enter a learner’s email address to find that particular learner. Or enter Smith to get all learners with Smith in their name. Enter 9 to see all learners who have 9 in any column.
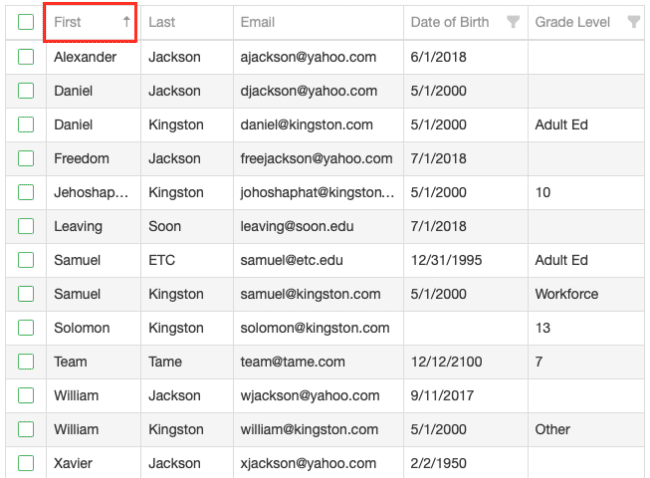
Sort columns by clicking on the column header. The data will sort in ascending or descending order. In the example below, the First Name column is sorted in ascending order.
Note: Use the scroll bar along the bottom of the grid to see across all of the columns. Resize columns by selecting and adjusting the horizontal grid line between columns, just like you would in a spreadsheet.
By using the column filters, a large Learner Pool list can be narrowed down to easily find the learners to add to the class roster.
Each column can be narrowed down by sorting by several criteria (see screenshot below).
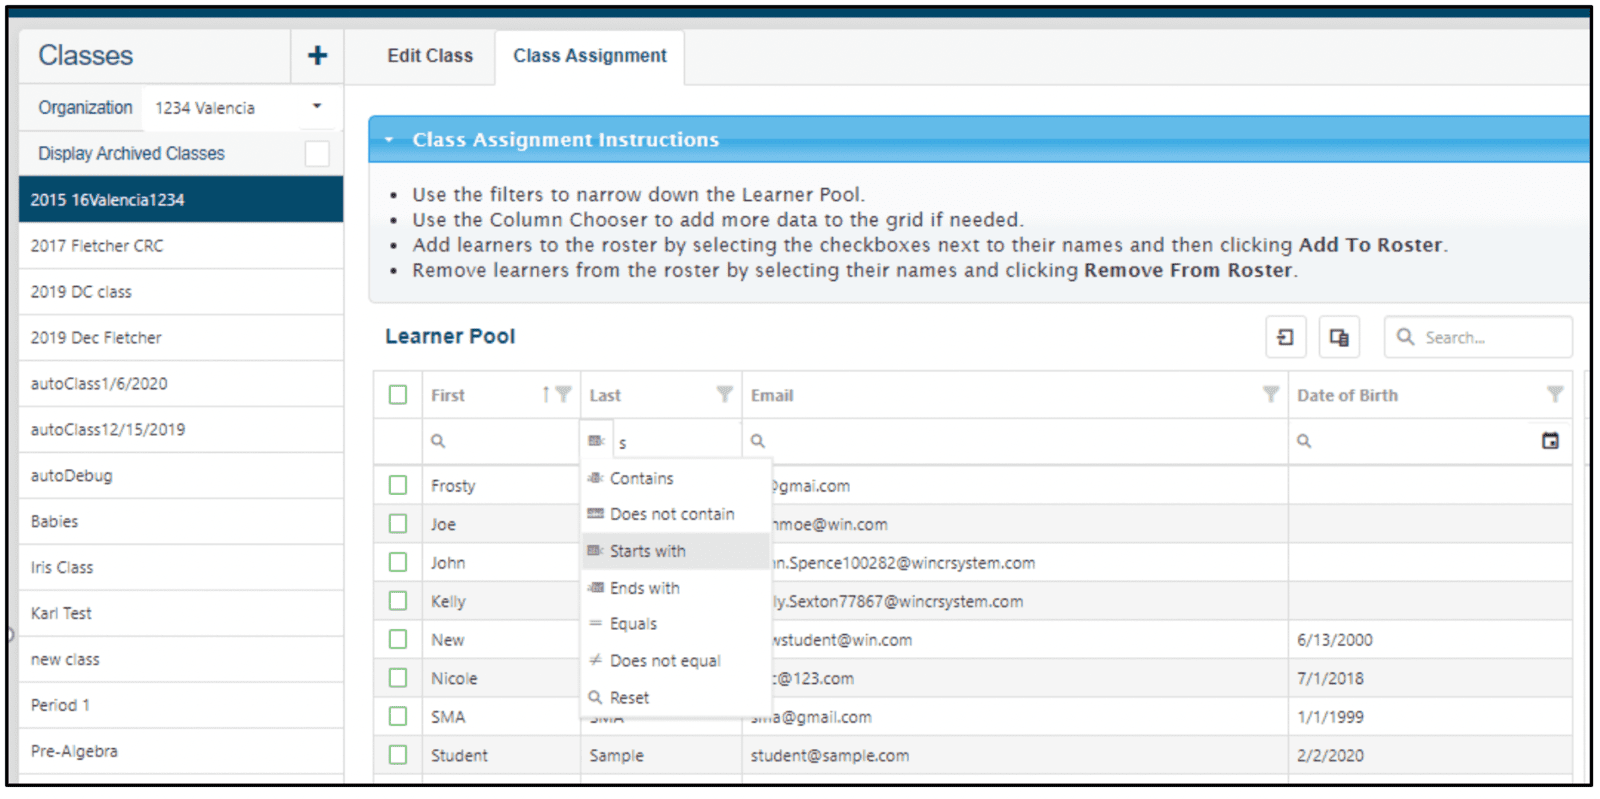
Since Last Active was added to the grid, learners can be filtered by Last Active or within a certain date range by clicking the funnel in the Last Active column header. This opens a selection box where dates can be selected.
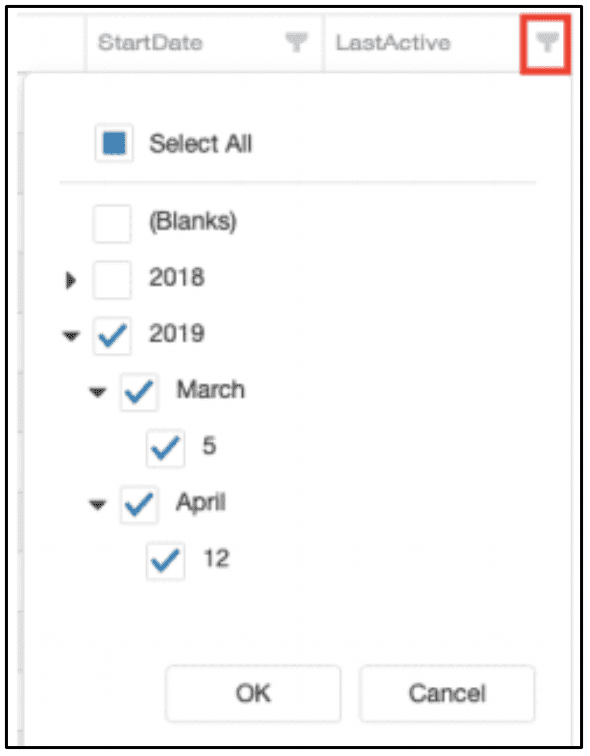
Select OK to receive a filtered list of learners who were last active in 2019. The column filter is active when it becomes dark gray.

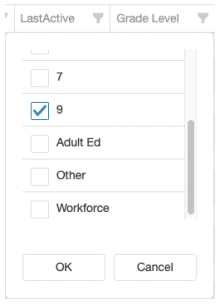
Filter by Grade Level, in this example 9.
Add to Roster...Remove from Roster
Once the Learner Pool is filtered down to a reasonable list, build the roster by selecting the green check mark next to each learner to add them the roster. Select all by clicking the green check mark at the very top left, in line with the column headers.
Note: Narrowing the Learner Pool down in order to add learners to the roster is optional. Scroll through the list and select the learners if preferred
Once the learners are selected, click Add to Roster.

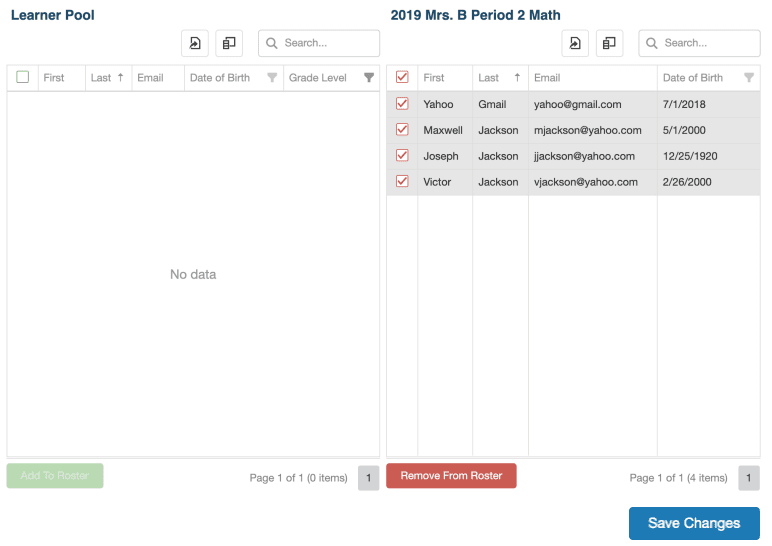
The learners selected move from the Learner Pool grid to the Roster (in this case named 2019 Mrs. B Period 2 Math). The learners will have the red check marks in case they need to be removed before saving changes. Click Remove From Roster to remove learners. Next click Save Changes and the red check marks will disappear and the roster will be saved.
Remove learners by selecting the red check mark next to the learner’s name and then Remove From Roster. Add new learners to the roster as needed by selecting learners from the Learner Pool and then selecting Add to Roster.
Note: Learners may still be in the Learner Pool grid if they have not been added to the class. Be sure to undo any filters that were applied to see other learners.
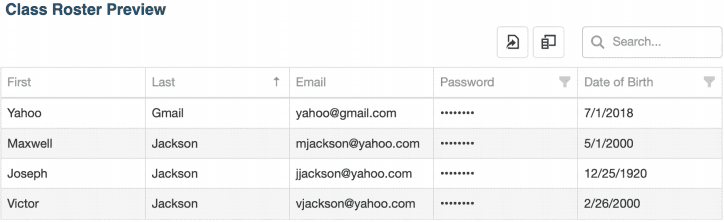
Class Roster Preview
Now the class roster is created, navigate back to the Edit Class tab and the new class will be displayed in the Class Roster Preview grid.

Use the Column Chooser to add columns to the Class Roster Preview grid.
Editing an Existing Class
To edit an existing class, locate the class from the list in the left panel. Administrators of more than one organization will use the organization tree to navigate to the desired class.
Note: Facilitators can only see the classes to which they belong. If a facilitator needs access to a class, another facilitator with access or an administrator with access can add them.
On the Edit Class screen, edit the class name, the reset date, and/or the facilitators, then click Save Changes.
On the Class Assignment screen, edit the roster of learners in the class. Use the steps above to add or remove learners from the class roster.
Exporting Rosters
All three grids have Export to Excel enabled: the Learner Pool and Class Roster grids in Class Assignment, and the Class Roster Preview grid in Edit Class.
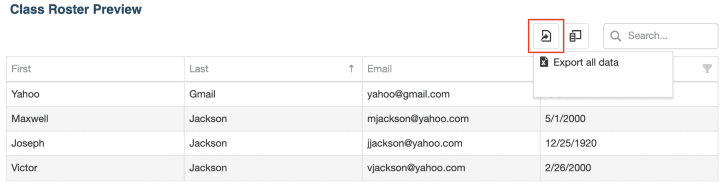
To export a class roster, configure the roster with the columns to export using the Column Chooser. Then select the Export icon in the top right corner of the grid. Select Export all data. This will export all data in the columns selected, even if it spans multiple pages.
Excel:

Note: Passwords can only be added to the Class Roster Preview grid on the Edit Class screen. Select Password from the Column Chooser. Passwords will be obfuscated on the screen, but will export